Hello and welcome to a special edition.
I've had a request for a little more info on
how I make my quilt labels so today I'm
sharing a quick tutorial on what is likely a
slightly different method than most quilters use.

I really enjoy hand-sewing but, at the risk of starting
a "by hand v. by machine" debate, I'm a huge fan of
machine-binding because it saves so much time.
Hours that can be spent on my next quilt!
I've done it for years now and it still amazes me,
all that time saved! It was a simple step over to sewing
the label down by machine as well, and then those
binding scraps just begged to be part of the show.
My Method for Quilt Labels
Important!
This step fits in after sewing the top of the
binding on and before sewing down the back.
Supplies:
Lightweight fusible interfacing
Muslin
Excess binding from quilt

Tip: To make this even more efficient, keep a stash of
supplies ready. A pile of 6x6 muslin squares and
interfacing triangles (a scant 6x6" cut diagonally)
sits in my sewing cabinet at all times.

To make a label, place the interfacing
along one side of the muslin as shown.

Fold the muslin over and press into a triangle,
fusing the interfacing down at the same time.
At this point, use your normal method of writing
your label info. I use the basic embroidery on my
sewing machine. First pressing in a vertical center
line and then marking the horizontal lines with
disappearing ink for an orderly placement.
If you embroider also, it's best to do this on the
side of the interfacing, using it as a stabilizer.

Next grab that excess binding you are left with after
sewing the top part of your binding down. If, by magic,
you had just enough and nothing left, go for some
other accent fabric in your quilt.

I like to make this strip thinner so when your binding
is still folded in half, trim to 7/8". Open it up and
press each side in to the center.
(This is like making bias tape.)

Next, press your strip in half again,
making a narrow trim.
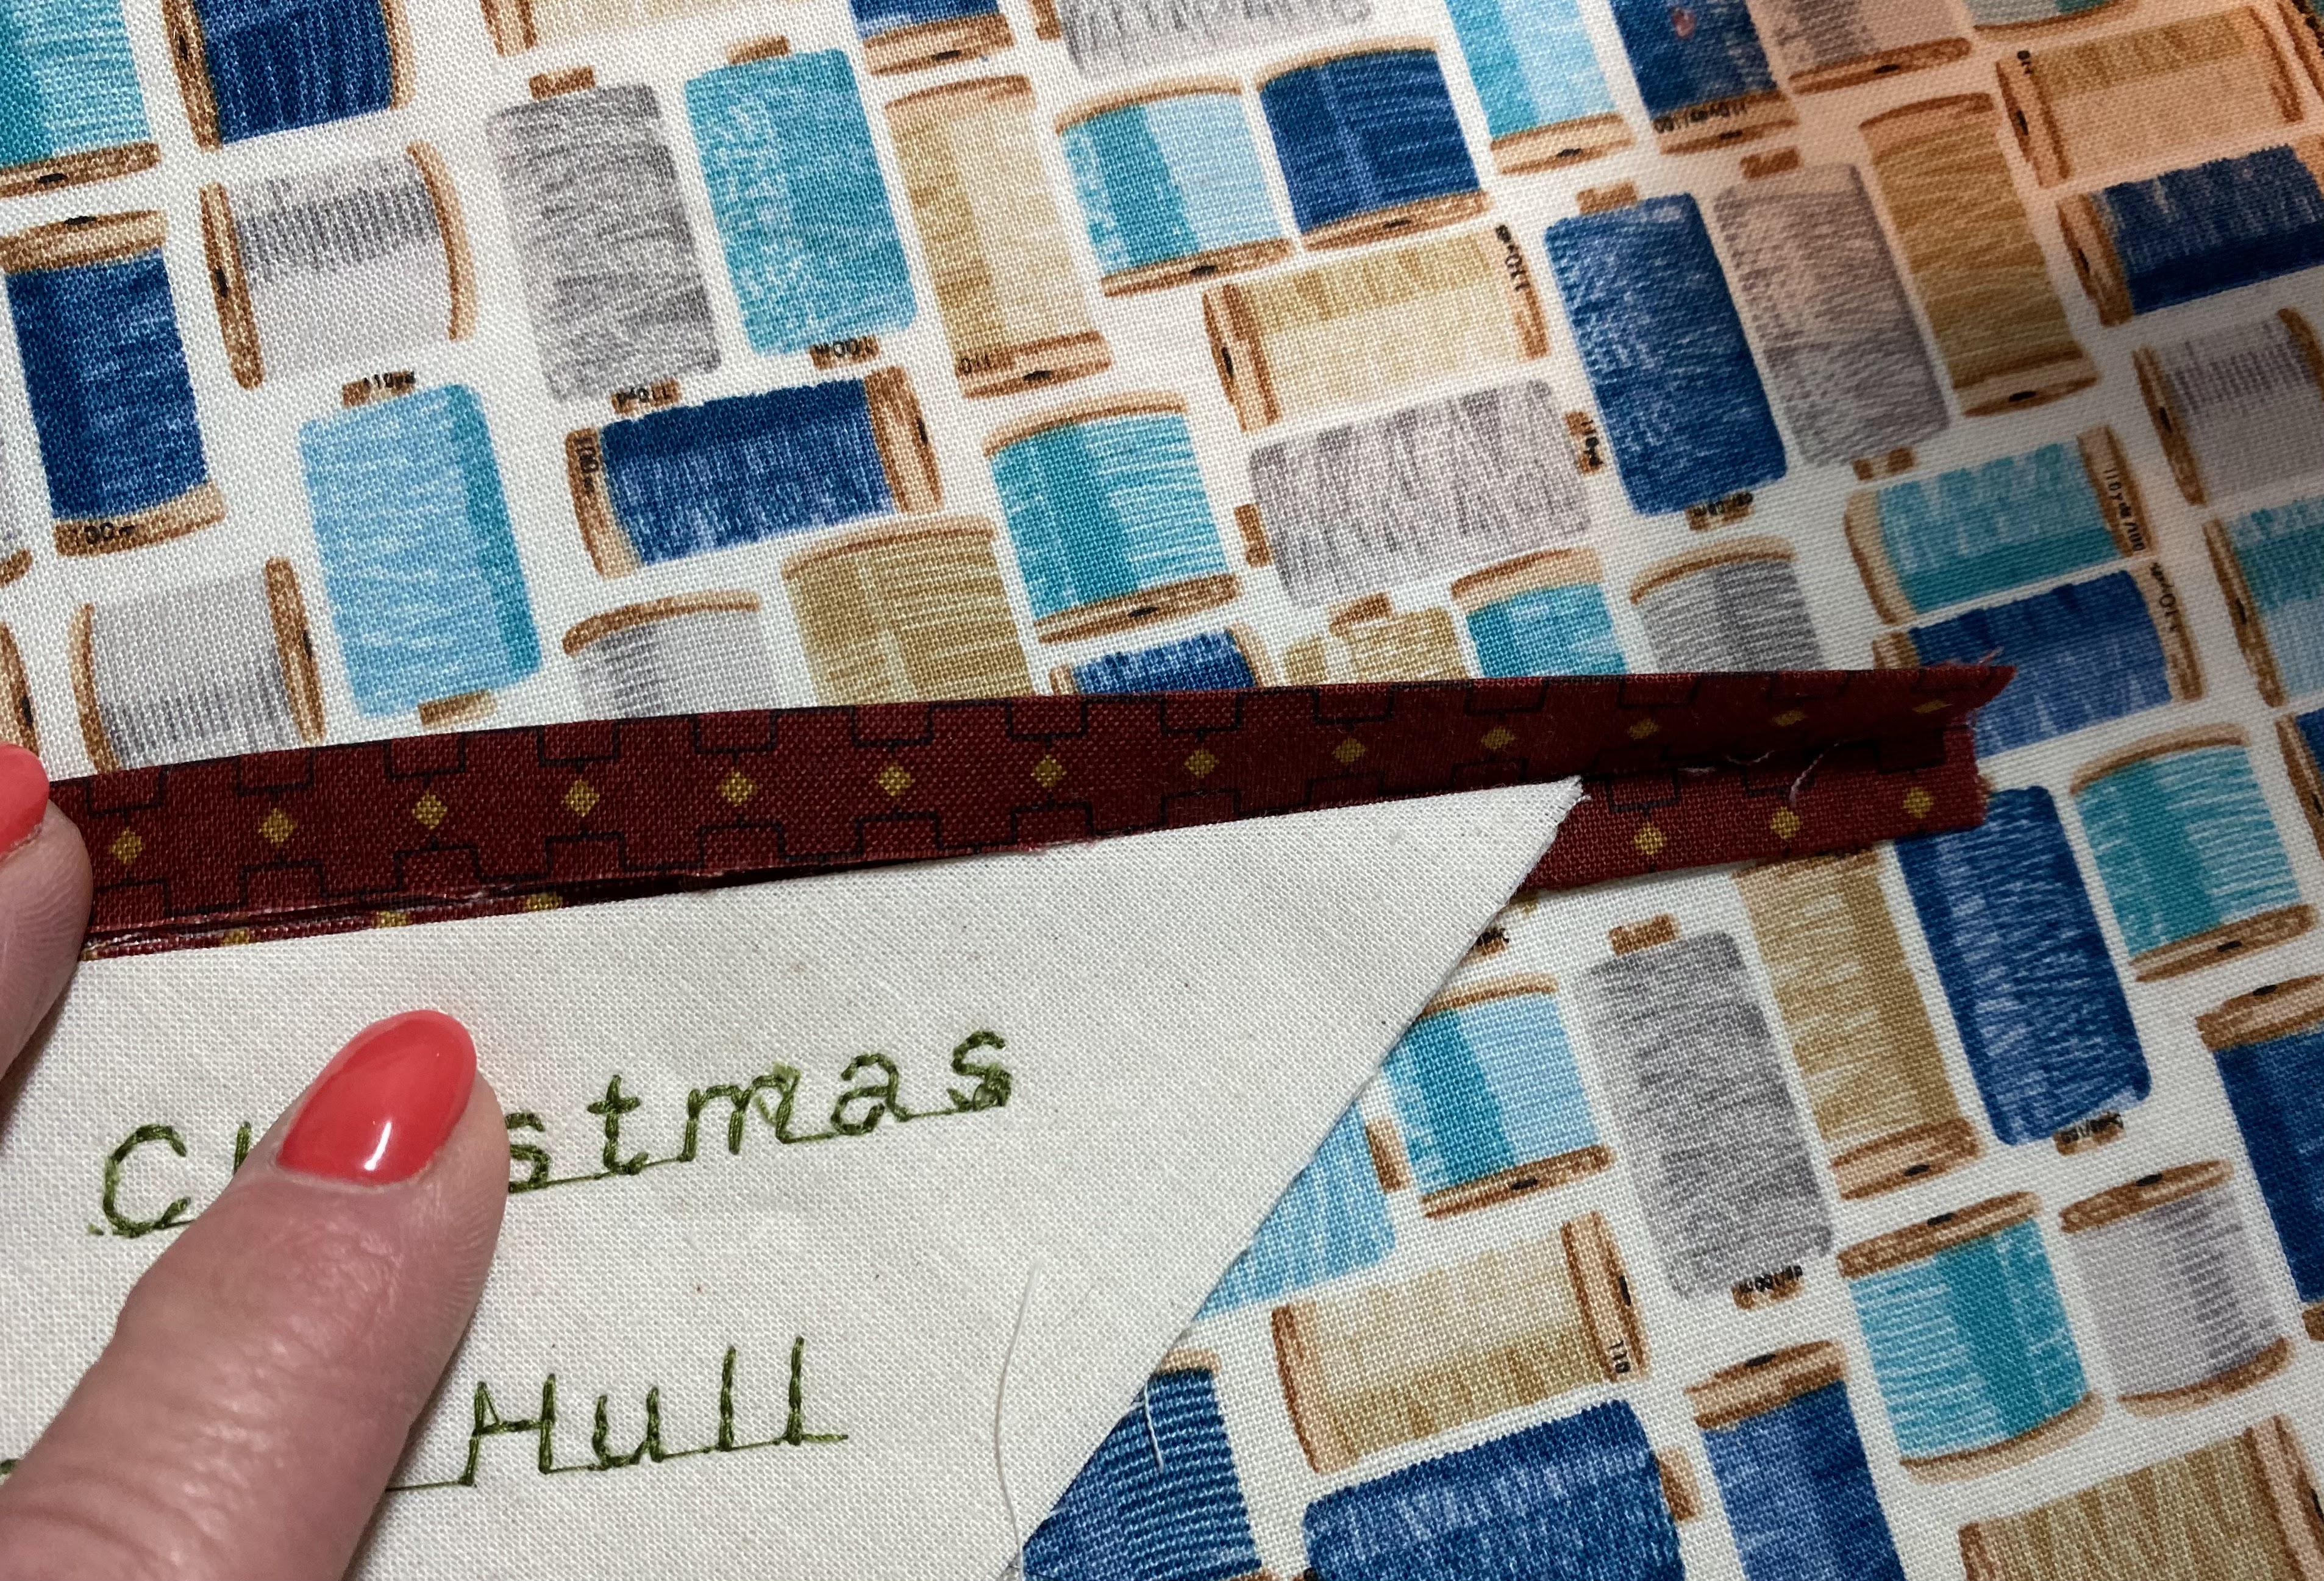
Opening it at the fold, slip the top of your triangle label
into the trim, placing it snugly up along that center fold.

Fold your trim back down over the label.
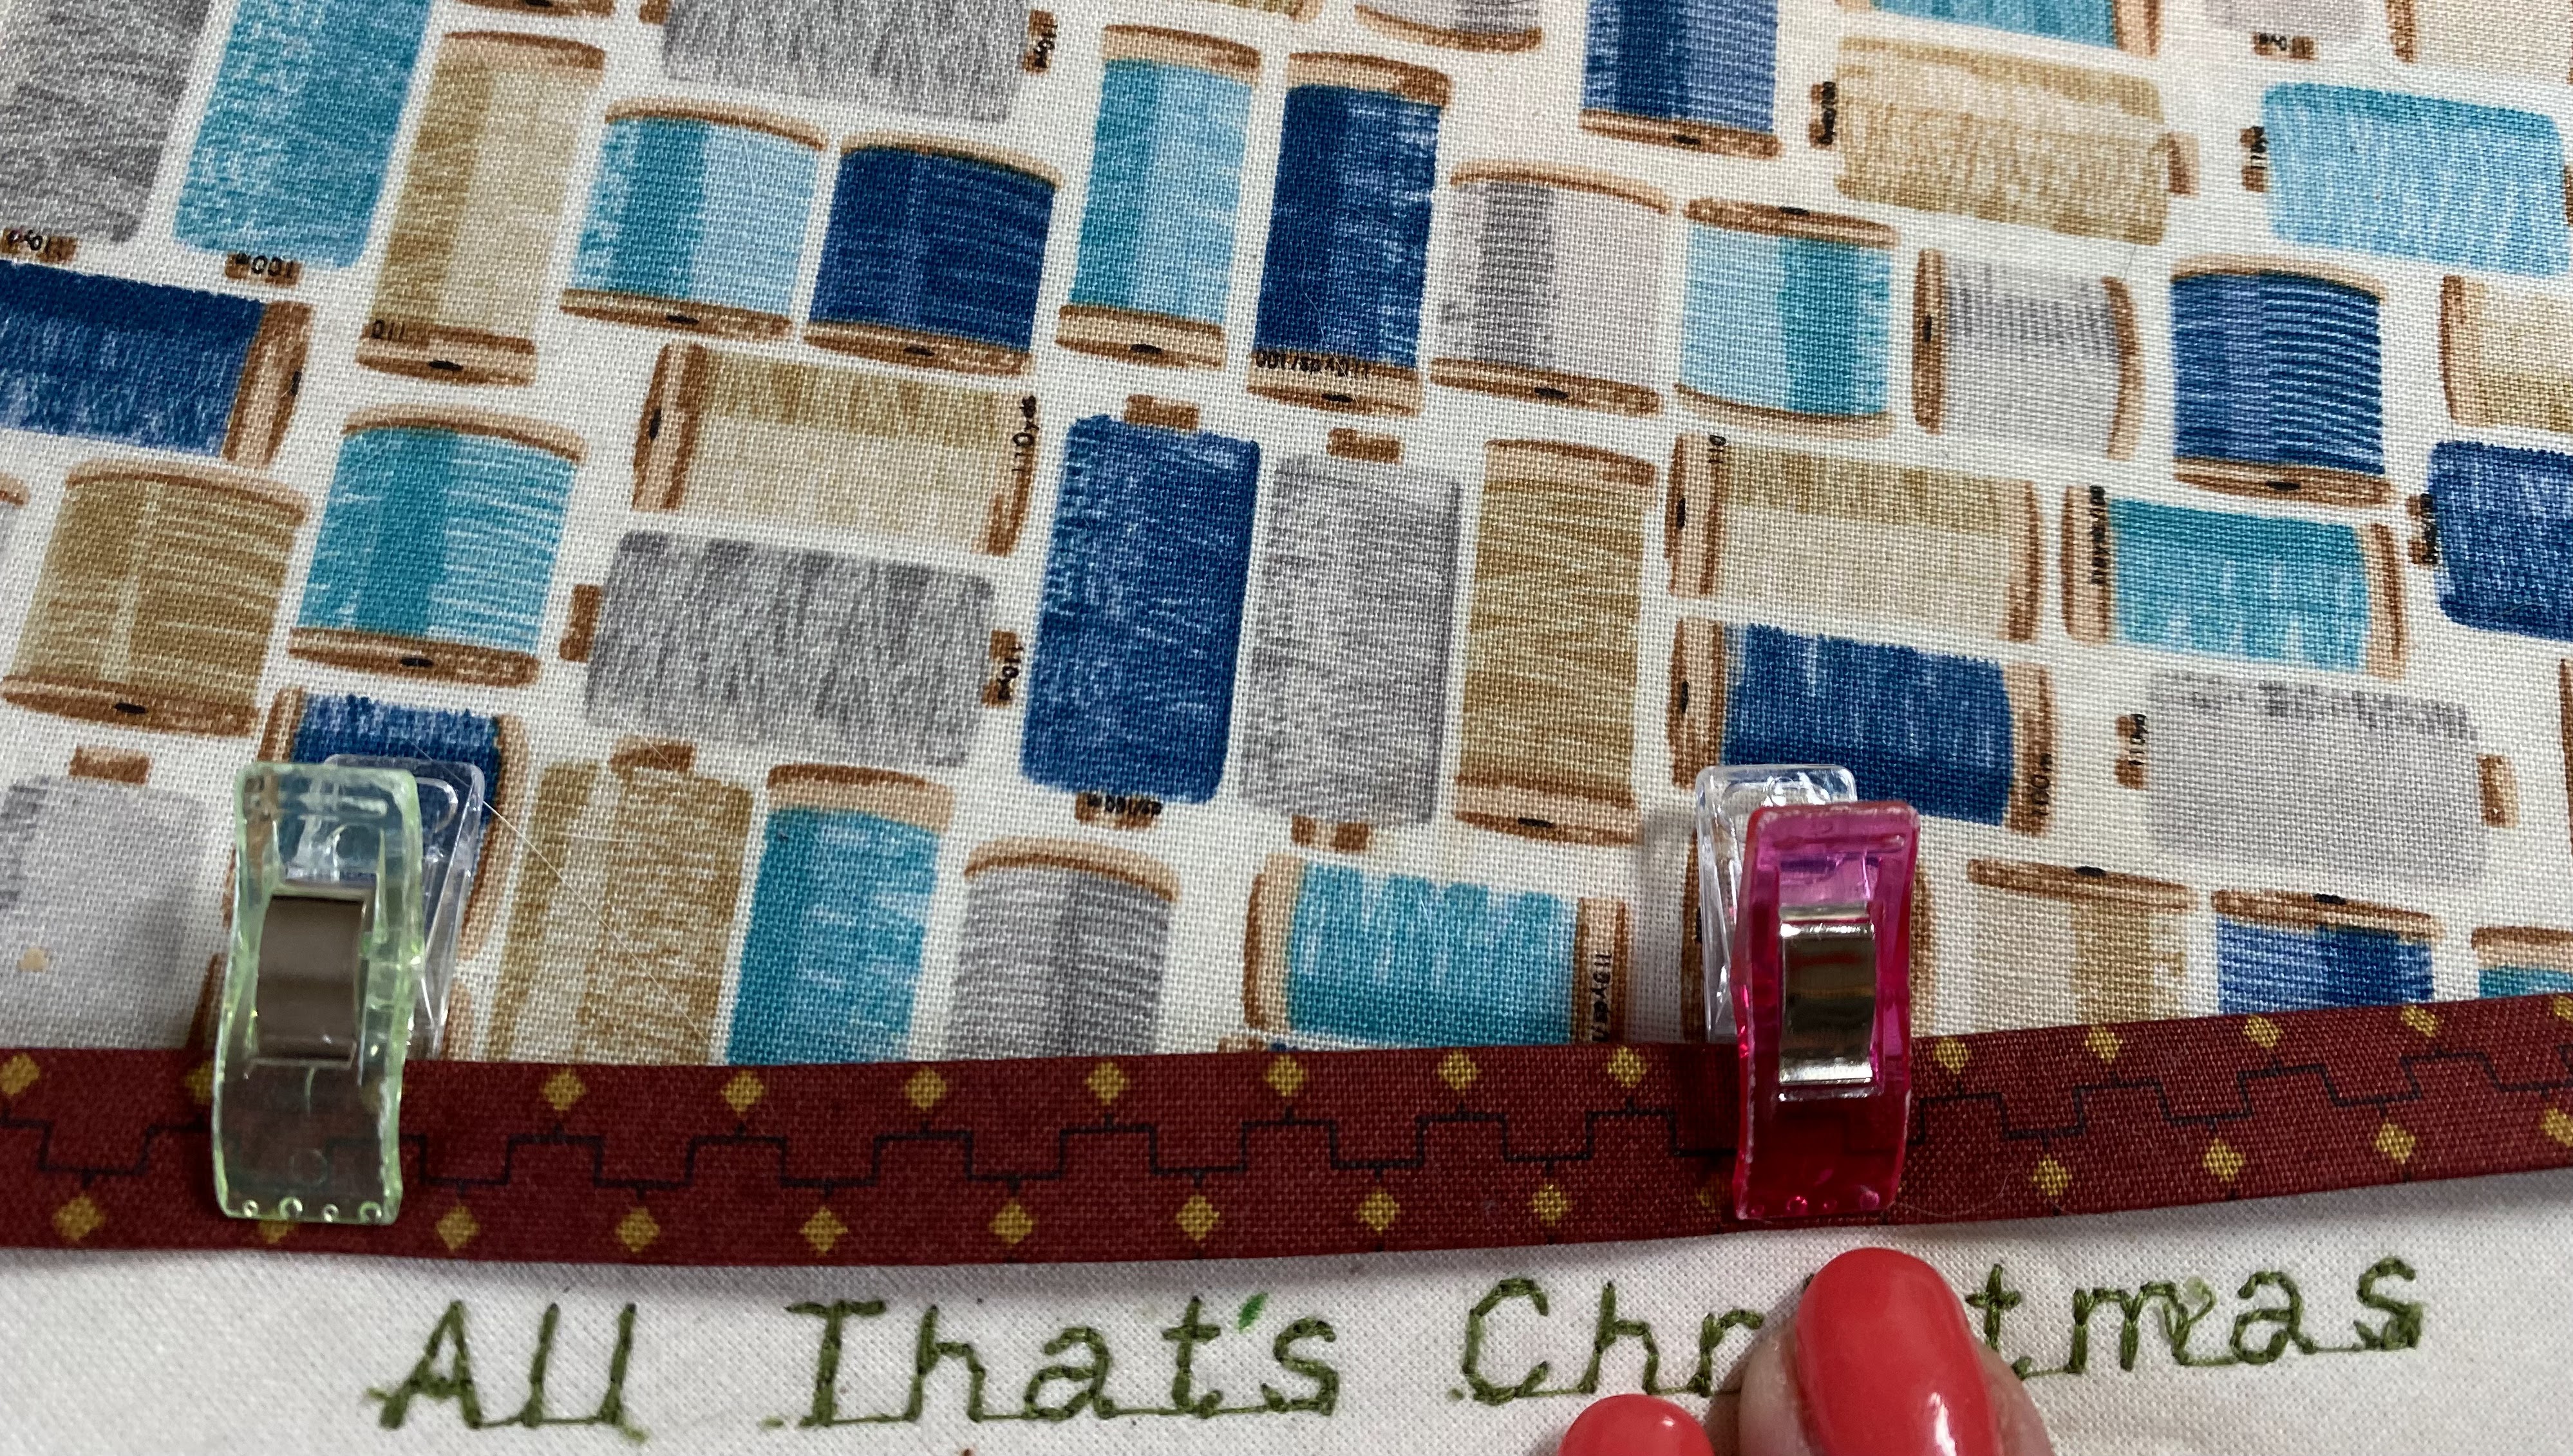
Wonder clip, or pin, into place and topstitch down.
Now we're ready to insert the label into the quilt.
When the top of my binding is sewn onto my quilt, I press
it down from the front, and again on the back as I fold it
into place and clip. This really helps me keep things straight.

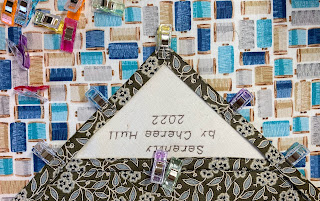
(*Showing a different quilt in the remaining pics)
When I'm pressing and clipping that binding down on
the back, I insert the label in a lower corner and clip well.
Especially at the far points of the label that didn't quite
get into the above pic--this is where it has the greatest
chance of slipping out as you move it to the machine.
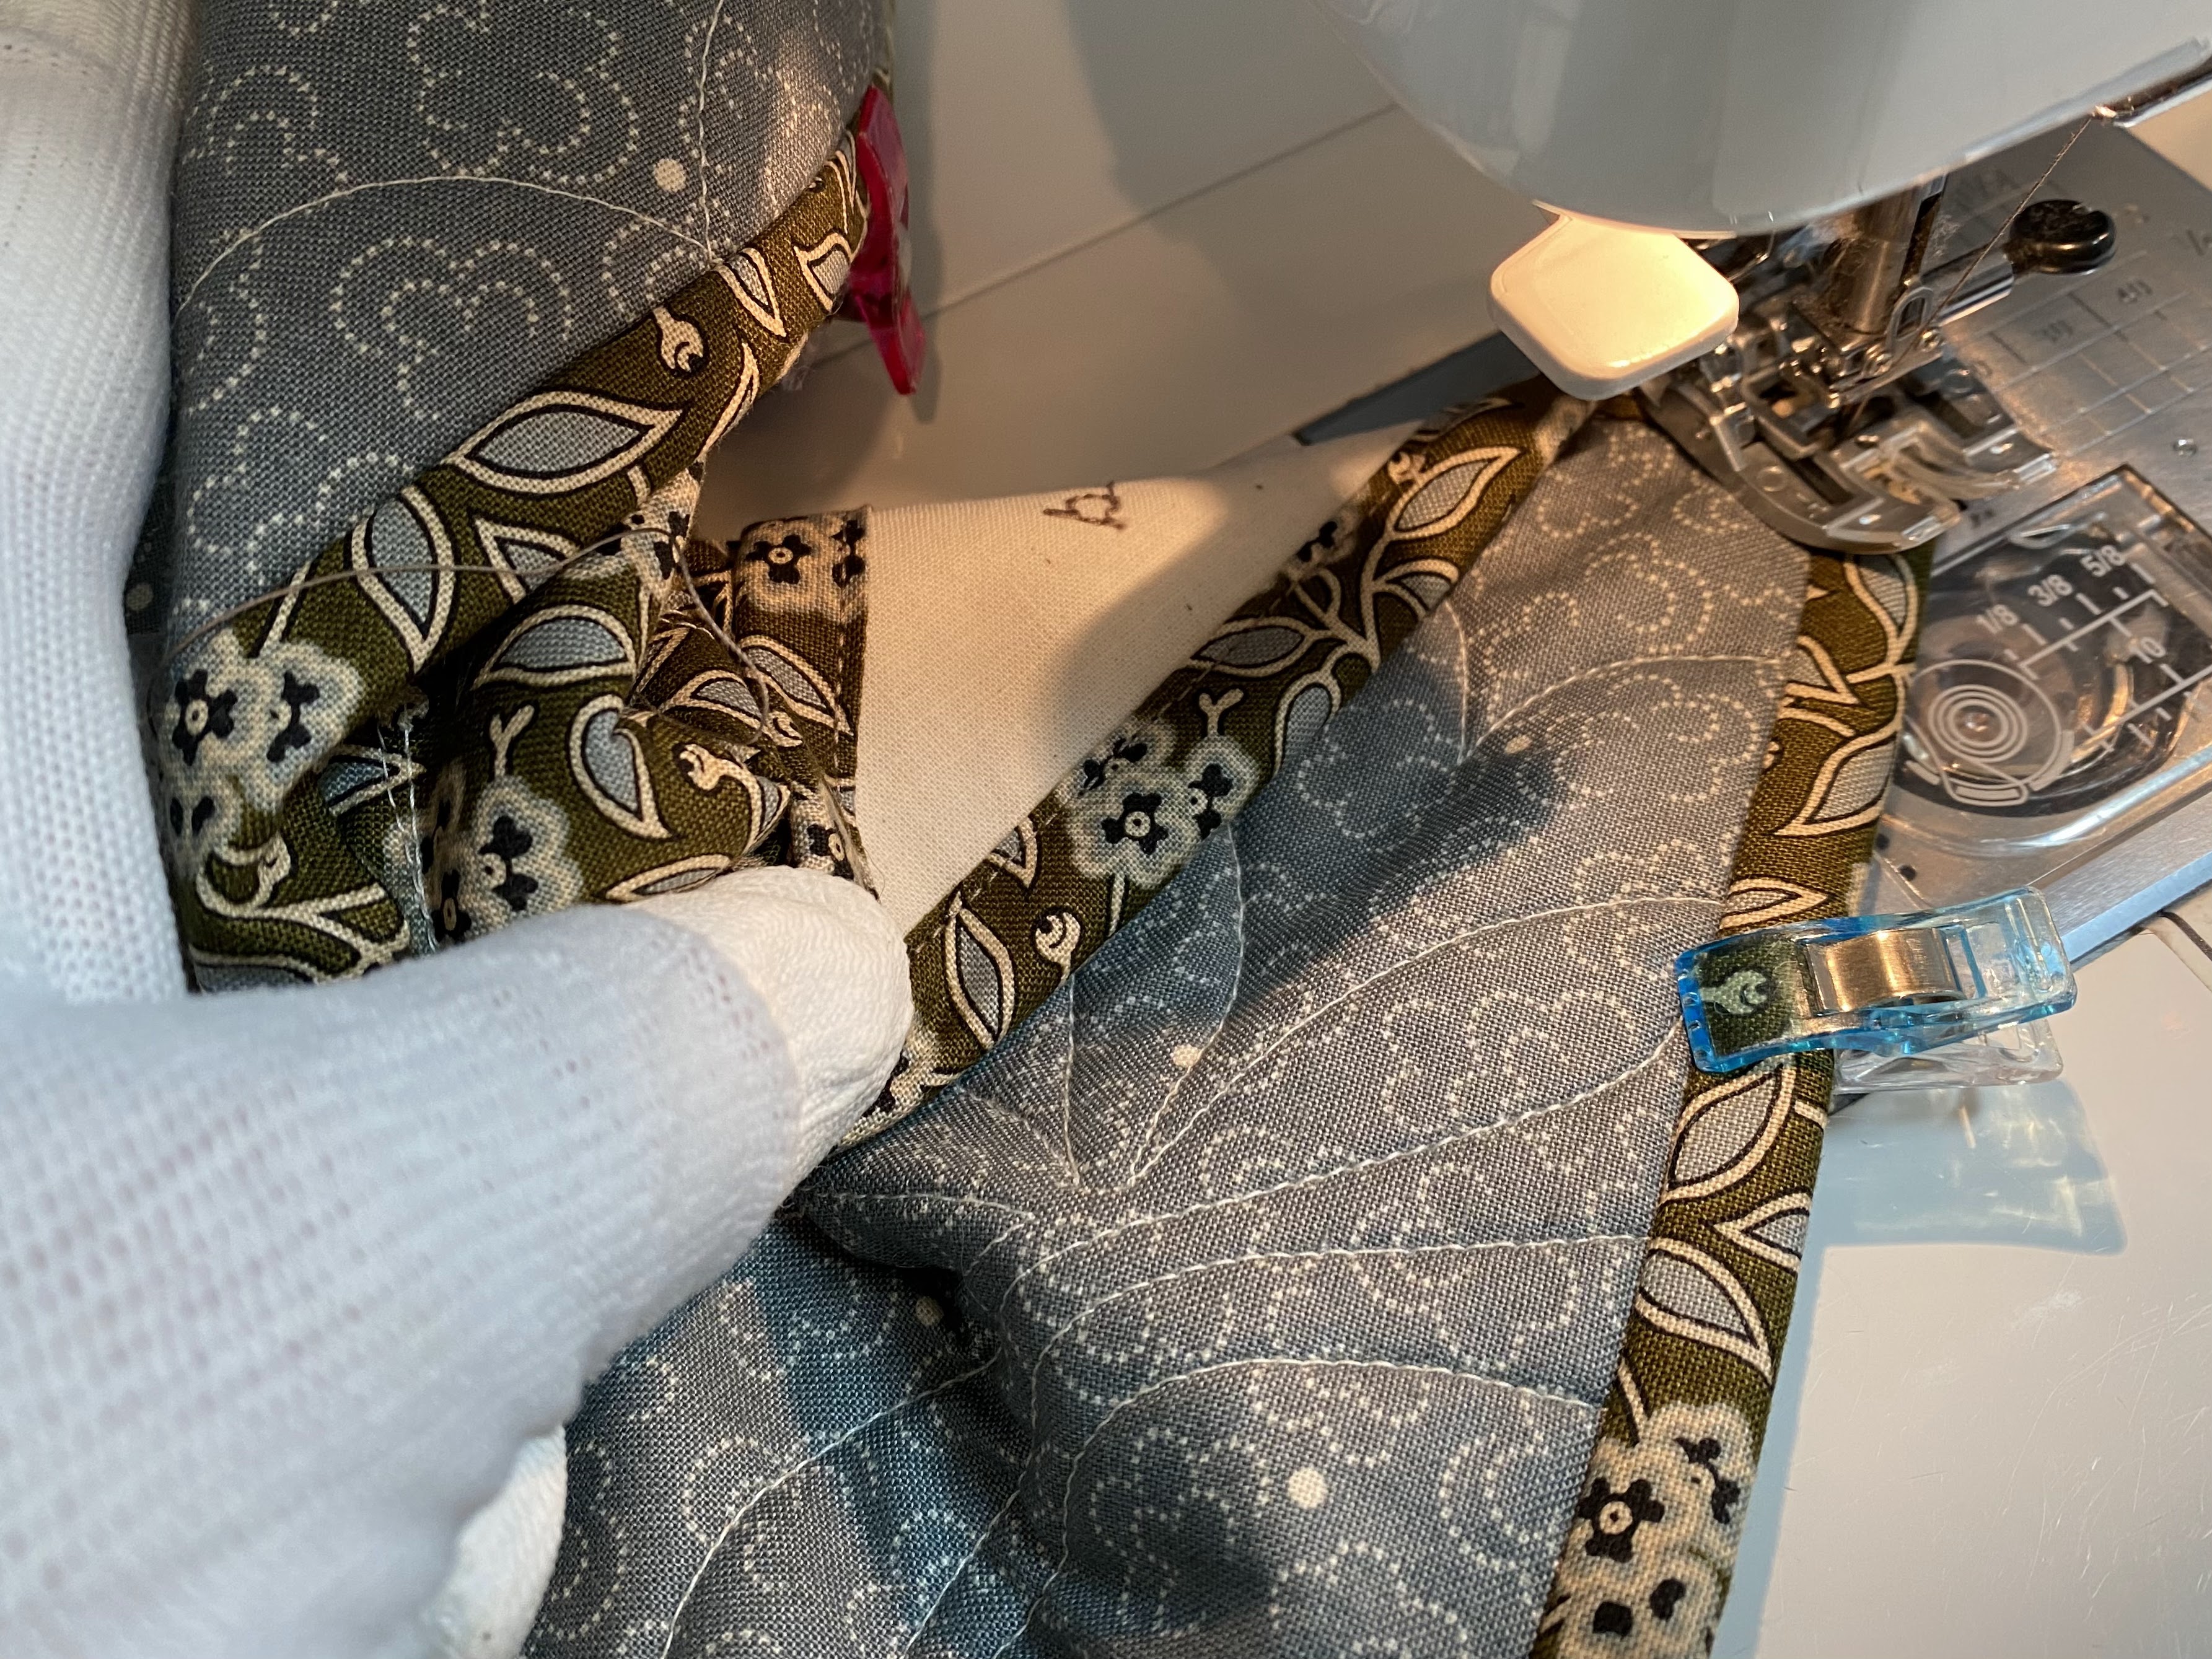
The label will add a bit more bulk so grabbing this
section of the binding when sewing it down can be
a little tricky, especially if you like a narrow binding.

I always start sewing my binding down right here so
I remember to give it a little extra attention,
and perhaps a little tight pull if needed.
When I turn the corner, I flip the back over to
make sure things are off to a good start.
(Better to make any adjustments now!)
**Update**
I forgot to add that when gifting the quilt, you can
I forgot to add that when gifting the quilt, you can
tuck a large tag with washing/care instructions
in the little "pocket" created by the label.
I rarely do tutorials so I hope this is clear.
I feel these labels go on so quickly and
have a nice professionally-finished look to them.
I hope you'll give 'em a try. If you find you love them
as much as I do, please let me know and if they end
up on your blog, please give a link back here.
I would appreciate it!
Happy [faster] quilting!
Comments
P.S. I'm going to PIN this should I ever get another finish. :)